


Do I need an extra flat iron for keratin treatment?
PURE KERATIN on 31st Dec 2025

Do You Need an Extra Flat Iron for Keratin Treatment? The Ultimate Guide
If you’re considering a keratin hair treatment at home or at a salon, one of the most common questions is whether you absolutely **need a flat iron** — and if you need a **specific extra flat iron just for this purpose**. The short answer is: yes, a high‑quality flat iron is essential for professional‑grade keratin results, but how and when you use it matters. This guide explains everything from tools and temperatures to aftercare and alternatives.
What Is a Keratin Treatment?
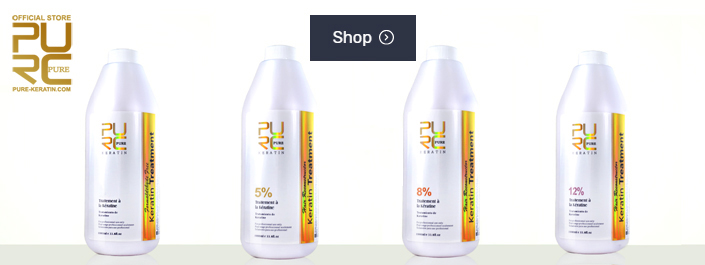
A keratin treatment infuses the hair with keratin protein to strengthen, smooth, and dramatically reduce frizz. It doesn’t permanently straighten the hair like a relaxer, but instead fills in gaps in the hair’s cuticle, creating a sleek, shiny, manageable finish. The process typically involves application of a keratin solution, followed by heat‑sealing with a flat iron to lock in the treatment.
Why a Flat Iron Is Critical to Keratin Treatments
The essential role of a flat iron in keratin treatments isn’t optional — it’s functional. The heat from the iron **activates and seals** the keratin molecules into the hair shaft, which is what creates long‑lasting smoothness. Without the right heat, the keratin won’t properly bond, and the results will be weaker, short‑lived, or uneven.
During the keratin application process, stylists and at‑home users alike rely on a flat iron to:
- Seal keratin into cuticles after application.
- Eliminate frizz and finalize straightness.
- Create a smooth, reflective finish.
Do You Need a Separate Flat Iron Just for Keratin?
The answer depends on what equipment you already have.
If your current flat iron meets professional standards — adjustable temperature control, high‑quality plates, and even heat distribution — you can absolutely use it for keratin treatments. However, most everyday flat irons are not ideal because:
- They lack precise temperature control needed for keratin sealing.
- They may not reach the high temperatures required (often 400–450°F / 200–230°C).
- They can damage hair if heat isn’t distributed evenly.
That’s why many people **invest in a separate, high‑quality flat iron** specifically for keratin treatments — especially if they plan to perform treatments multiple times or want the best long‑lasting results.
Key Features to Look for in a Keratin Flat Iron
When choosing a flat iron for keratin:
- Adjustable temperature settings — You need precise control, not just low/medium/high.
- Ceramic or titanium plates — These provide smooth gliding and even heat distribution.
- Wide plate options — Wider plates help seal larger sections of hair faster on long or thick hair.
- Professional build quality — Durable construction matters if you’ll use it often.
Best Temperature for Flat Ironing During Keratin Treatment
The ideal temperature depends on your hair type and the specific keratin formula used:
- Fine or damaged hair: 300–375°F (150–190°C).
- Normal hair: 375–425°F (190–220°C).
- Thick or coarse hair: 425–450°F (220–230°C).
Using higher heat ensures that the keratin bonds fully seal into the hair cuticle. Too low, and the treatment won’t last as long; too high, and you risk heat damage.
Flat Iron Use During Keratin Application: Step‑by‑Step
Here’s how a flat iron is used during a keratin application — whether at home or in a salon:
1. Preparation
Start with clean, towel‑dried hair. Many protocols recommend pre‑washing with a clarifying shampoo to remove buildup so keratin can penetrate the hair shaft.
2. Application of Keratin Solution
Apply small sections of the keratin solution from root to tip. Make sure every strand is fully coated.
3. Initial Drying
Use a high‑quality blow dryer to thoroughly dry the hair before flat ironing. Wet hair can be heat damaged.
4. Sealing With the Flat Iron
This is the critical step. Section the hair in ½‑inch pieces and run the flat iron over each section multiple times (usually 7–10 passes) at the appropriate temperature.
Pro tip: Hold the flat iron steadily and glide slowly for even sealing — quick passes won’t activate the keratin fully.
Aftercare: Do You Need to Flat Iron Your Hair After the Treatment?
Once the treatment is completed and sealed, maintaining the results becomes the next priority.
According to long‑standing keratin aftercare recommendations:
- Wait **48–72 hours after the treatment before flat ironing or washing your hair** so the keratin fully bonds.
- If you notice bends or creases from sleeping or moisture, you *can* gently flat iron before the 72‑hour mark to correct them — but do so carefully.
- Always use a high‑quality heat protectant before any heat styling.
In most cases, you don’t need to flat iron every day after the initial 72 hours. Many people find that the keratin treatment has already given their hair the smooth effect they want, making daily heat styling unnecessary.
Common Myths About Flat Ironing Keratin‑Treated Hair
- Myth: “You must flat iron every day to maintain results.” — False. Routine flat ironing isn’t required and can cause cumulative heat damage.
- Myth: “Any flat iron will work.” — Low‑end irons often fail to seal keratin properly. A professional‑grade unit is worth the investment.
- Myth: “High heat makes hair smoother faster.” — Too much heat without control can damage hair and strip keratin over time.
Alternatives if You Don’t Want to Buy a Flat Iron
If you’re hesitant to invest in a separate flat iron, here are options:
- Use a professional salon flat iron: Salons often invest in advanced tools that deliver better results than consumer models.
- Borrow or rent high‑end flat iron tools: Some hair professionals offer loaner tools for at‑home treatments.
- Blow‑dry and brush: While not a perfect substitute, thorough blow‑drying with a round brush can partially help activate keratin — but it won’t seal as effectively as a hot flat iron.
Flat Ironing Tips to Protect Hair Health
- Always use heat protectant sprays to shield hair from thermal damage.
- Don’t flat iron wet or damp hair. Heat can cause boiling inside hair strands, weakening cuticles.
- Keep settings consistent — fluctuating temperature can stress hair.
- Section hair neatly — this ensures even heat distribution for each pass.
Tools That Work Best With Keratin Treatments
Aside from a superior flat iron, professional keratin treatments benefit from:
- Premium blow dryers with concentrator nozzles for smooth pre‑ironing drying.
- Quality brushes that glide without pulling.
- Heat protectant products formulated for keratin‑treated hair.
Maintenance Beyond Flat Ironing
To extend keratin results:
- Use sulfate‑free shampoos and conditioners.
- Avoid saltwater chlorine — they break down keratin.
- Sleep on silk or satin to reduce friction.
- Schedule touch‑ups every 3–6 months.
Summary: Do You Need an Extra Flat Iron?
Yes — you need a good flat iron to achieve and seal professional‑quality keratin treatment results. A dedicated high‑quality unit with adjustable heat and even plates makes the difference between long‑lasting smoothness and weak, short‑lived results. After the initial application and sealing, you generally won’t need to flat iron daily — only to correct bends or for additional styling.
Final Recommendation
If you’re serious about at‑home keratin treatments or want salon‑style results, invest in a professional‑grade flat iron with precise temperature control and quality plates. Your hair (and peace of mind) will thank you.
Related Resources
